
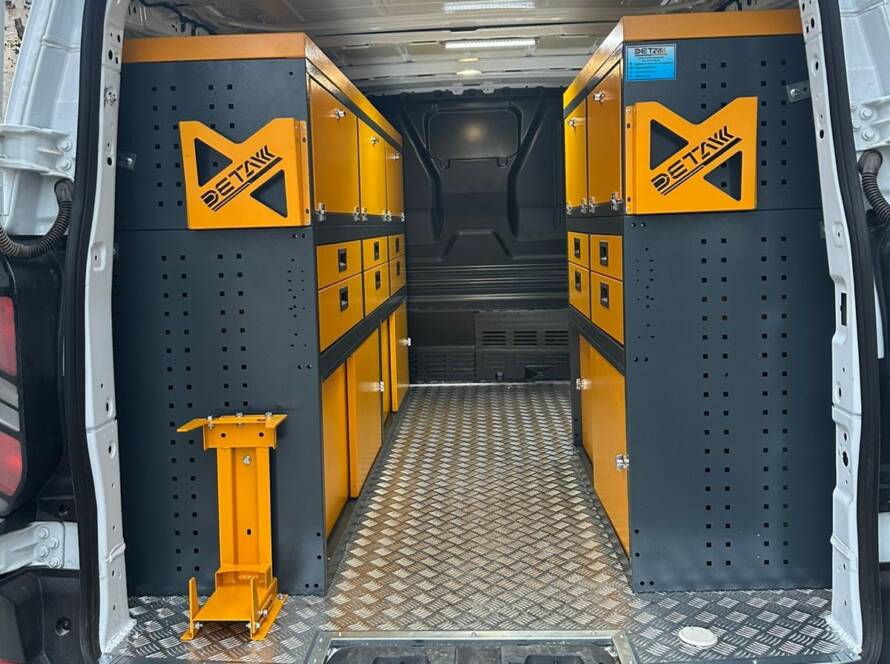
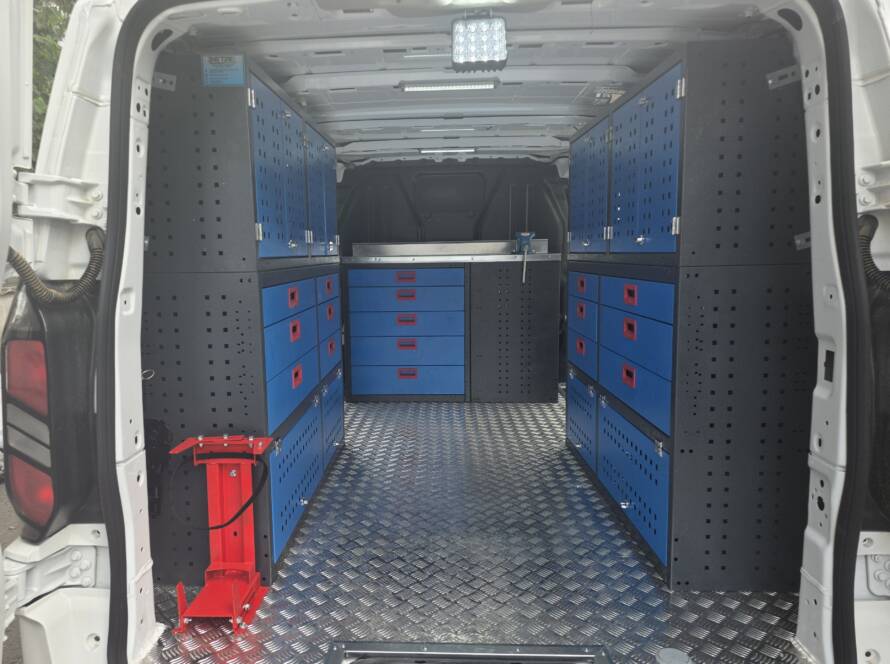
A roadside assistance vehicle must remain ready for situations that are difficult to predict, because one call may involve a flat battery on a quiet residential street, while the next may require technicians to work beside fast moving traffic with jacks, diagnostic devices, power tools, towing accessories, warning equipment, spare parts, and heavy cases. 🚐🔧 When I open the rear door of a professionally organized assistance vehicle, I can immediately feel whether safety guided the design, because secure drawers remain closed, heavy tools sit low, warning equipment can be reached before the technician steps into danger, and sensitive devices occupy protected compartments instead of sliding around with oily components. A drawer cabinet does much more than improve appearance in this setting; it controls movement, reduces searching, protects valuable equipment, supports accurate inventory checks, and helps the technician concentrate on the roadside hazard rather than the disorder inside the van. This is why Detay Industry approaches vehicle storage as an integrated mobile workplace in which the cabinet, its fastening points, its drawers, and every item inside them must work together.
Begin with the Roadside Assistance Workflow
The safest drawer arrangement begins with a careful review of the tasks technicians actually perform, not with a catalogue of standard cabinet sizes, because storage should follow the order of the job. I usually recommend mapping a typical call from arrival to departure: the technician parks safely, activates warning systems, puts on the required personal protective equipment, places warning signs or cones, assesses the vehicle, selects diagnostic or recovery tools, completes the intervention, collects used components, checks the work area, and returns every item to the service vehicle. The United Kingdom Health and Safety Executive advises roadside repair operators to plan work, assess the location, use appropriate personal protective equipment, keep workers visible, and ensure that equipment can be used safely, so warning items should be among the first things the technician can reach rather than being buried behind toolboxes. A dedicated roadside assistance vehicle layout should therefore place high visibility clothing, warning lamps, cones, gloves, and immediate response equipment close to the most frequently used door. 🚨
I once watched a technician arrive at a roadside call and move two heavy cases simply to reach a warning triangle, and although the delay was brief, the sequence exposed an important planning mistake: the vehicle had been organized according to item size instead of response priority. After warning equipment receives its own immediate access zone, the technician can establish a safer working area before searching for mechanical or electrical tools. I often describe this arrangement as a theatre curtain, because the safety equipment should open the scene before the technical performance begins.
Select Drawer Sizes According to Equipment Type
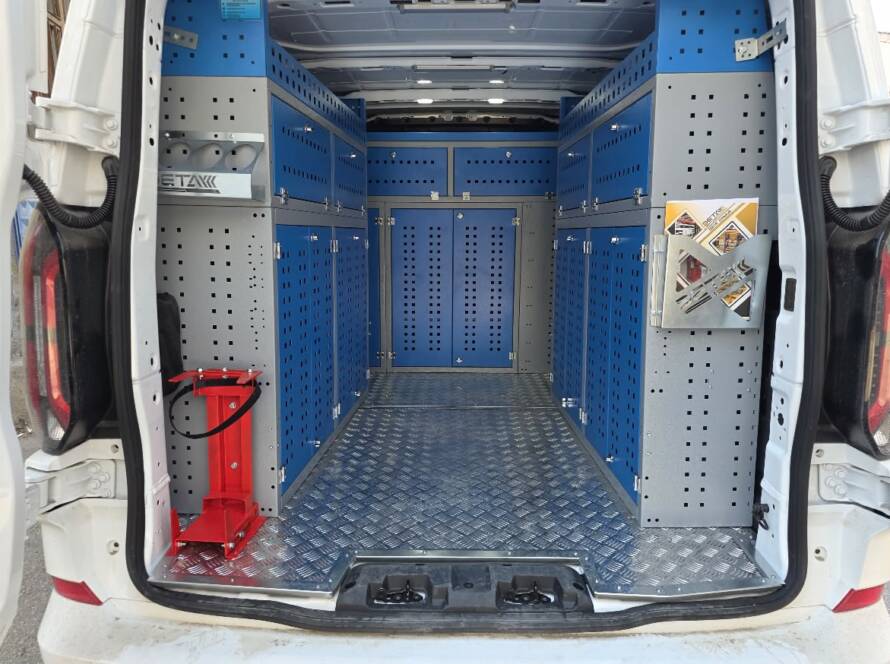
One drawer depth cannot serve every tool effectively, which is why a balanced in-vehicle tool cabinet normally combines shallow, medium, and deep drawers with enclosed cupboards and restrained open areas. Shallow drawers work well for sockets, terminals, fuses, adapters, test leads, valve tools, fasteners, and small diagnostic accessories because technicians can see the complete contents without stacking several layers. Medium depth drawers suit hand tools, cordless equipment, battery chargers, torque tools, and compact cases, while deeper compartments may hold heavier devices when the slides, cabinet structure, locking system, and installation have been engineered for the expected load.
Heavy lifting equipment, large battery boosters, compressors, and bulky recovery tools should generally remain low and close to a suitable loading door, because placing dense equipment high inside the vehicle increases lifting effort and can negatively affect the vehicle’s weight distribution. OSHA explains that ergonomic design aims to fit the job to the person, reduce fatigue, and limit exposure to awkward postures, bending, reaching, and repetitive handling. I therefore prefer to keep frequently used tools between approximately knee and shoulder height whenever their size and weight allow, while very heavy equipment occupies low drawers, pull out platforms, or separately restrained floor positions. The best drawer cabinet should feel like a familiar workbench rather than a puzzle that forces the technician to stretch, kneel, and rearrange equipment during every call.
Secure the Cabinet to the Vehicle and the Equipment to the Cabinet
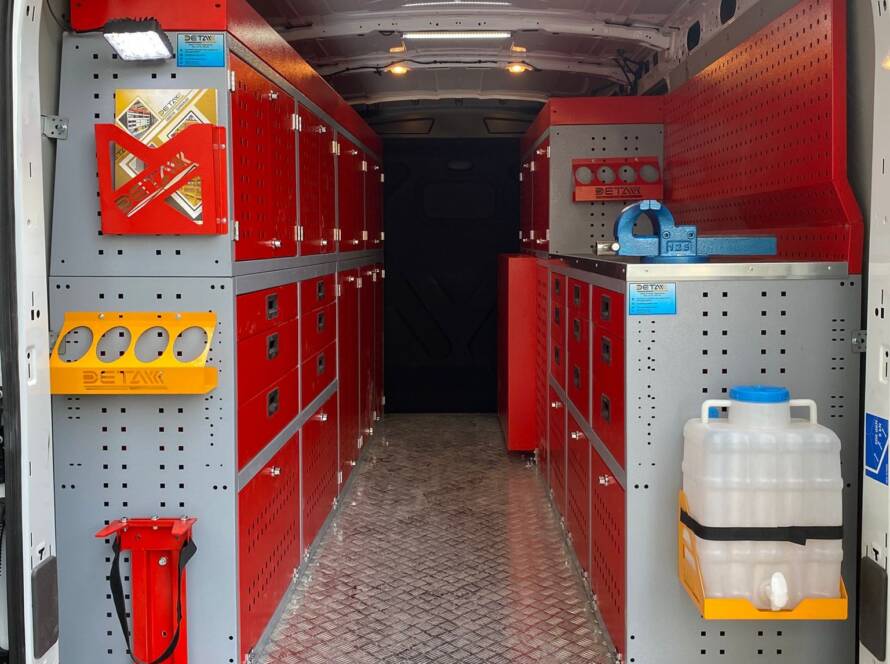
Equipment safety depends on two separate but connected levels of restraint: the drawer cabinet must remain securely attached to the vehicle, and the tools inside the drawers must remain controlled within the cabinet. The HSE states that anything transported on or in a vehicle must be secured, while the Driver and Vehicle Standards Agency explains that load securing principles apply to light goods vehicles and small vans as well as larger commercial vehicles. This means planners should never assume that closing the rear doors makes loose equipment safe, because acceleration, cornering, emergency braking, road vibration, and collisions can create forces that move tools, open unsuitable drawers, or overload weak fastening points.
A professionally engineered in-vehicle cabinet system should connect to appropriate structural or manufacturer approved mounting locations, using a vehicle specific installation design rather than random screws through interior panels. The drawer slides must match the real loaded weight, the locking mechanisms must prevent opening while the van moves, and the cabinet frame must resist repeated vibration without becoming loose or distorted. Heavy items inside large drawers may also need dividers, shaped inserts, retaining blocks, individual straps, or dedicated holders so that they cannot build momentum inside the compartment. I think of the cabinet mounting as the vehicle’s foundation and the internal organization as the walls of a house, because one cannot remain dependable when the other has been neglected. 🔒
| Equipment Category | Recommended Storage Method | Preferred Position | Primary Safety Control |
|---|---|---|---|
| Warning lamps, cones, signs, and high visibility PPE | Dedicated drawer or open access compartment with restraints | Immediately beside the side or rear door | Rapid access before roadside work begins |
| Sockets, adapters, fuses, terminals, and small parts | Shallow divided drawers with clear labels | Between waist and chest height | Prevention of mixing, loss, and searching |
| Hand tools and cordless power tools | Medium drawers with shaped dividers or tool holders | Close to the main working door | Controlled movement and easy inventory inspection |
| Diagnostic instruments and electronic devices | Lockable padded drawer separated from dirty tools | Comfortable reach height in a protected area | Protection from impact, moisture, vibration, and theft |
| Jacks, compressors, battery boosters, and heavy cases | Load rated deep drawer, pull out platform, or secured floor bay | Low and near the loading point | Reduced lifting strain and improved weight distribution |
| Damaged parts, oily components, and used consumables | Separate washable return compartment | Away from clean instruments and PPE | Control of dirt, leakage, and cross contamination |
Use Drawer Locks Designed for Vehicle Movement
A workshop drawer that performs well on a stationary factory floor may not automatically suit a moving service vehicle, because a van introduces constant vibration, slopes, sharp turns, potholes, and sudden deceleration. Every drawer should use a positive locking mechanism that technicians can operate easily while wearing gloves but cannot release accidentally during travel. The locking system should provide a clear indication that the drawer is closed, and it should remain functional when the cabinet is fully loaded rather than only when empty. Depending on the arrangement, a central locking system may secure several drawers simultaneously, while individually lockable compartments can protect expensive diagnostic devices or controlled equipment.
The drawer should also include a mechanical stop that prevents it from leaving its slides, and the slide system should resist lateral movement that could create noise, wear, or instability. A strong in-vehicle equipment rack can incorporate drawers, shelves, doors, and removable cases, but each moving element must be evaluated at its maximum intended load. When I assess a finished installation, I like to load the drawers with representative equipment and drive the vehicle on an appropriate controlled route, listening for movement and checking whether tools remain in their assigned positions. Silence is not the only measure of quality, yet a cabinet that rattles continuously often tells us that components are moving and wearing before we can see the problem.
Protect Sensitive Diagnostic and Electrical Equipment
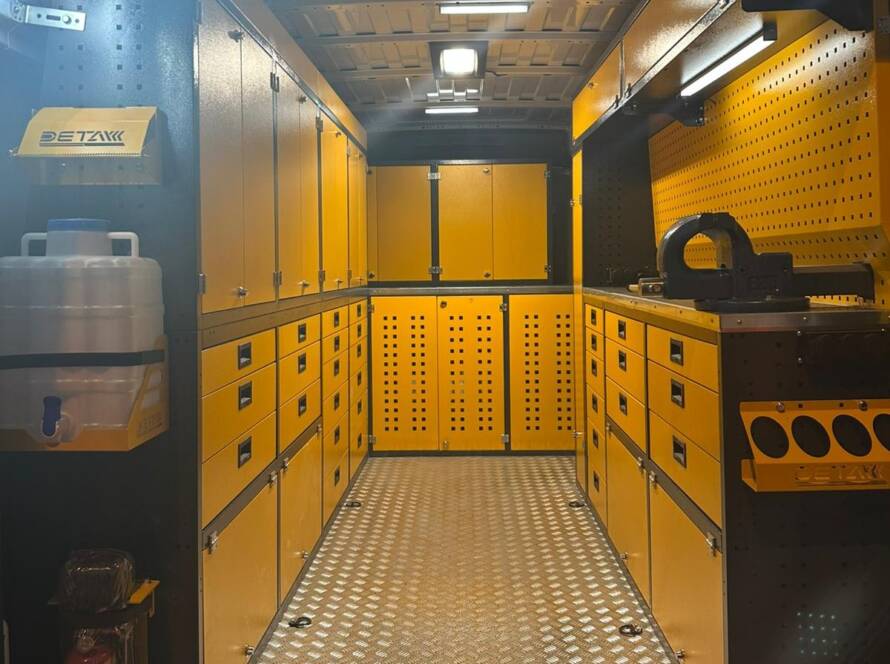
Modern roadside assistance vehicles often carry diagnostic computers, multimeters, battery analysers, thermal devices, electronic test tools, tablets, printers, chargers, and communication equipment, all of which require cleaner and more controlled storage than hammers, towing accessories, or oily mechanical parts. I recommend creating a protected electronics drawer with padded dividers, cable management, moisture resistant cases, and enough space to prevent connectors from being crushed. Devices waiting for charging, calibration, repair, or inspection should receive a visible status label so that a technician does not accidentally take unavailable equipment to an urgent job.
A separated in-vehicle material cabinet can hold clean consumables, diagnostic accessories, replacement connectors, protective covers, and documentation, while used materials remain in another compartment. The vehicle’s charging installation should follow the equipment manufacturers’ instructions and the vehicle’s electrical conversion requirements, with appropriate cable routing, circuit protection, ventilation, isolation, and mounting. Loose chargers and extension leads should never cross the central aisle or become trapped behind drawers. A carefully integrated solution by Detay Industry can combine physical storage and electrical planning so that equipment remains protected both while technicians work and while the vehicle travels.
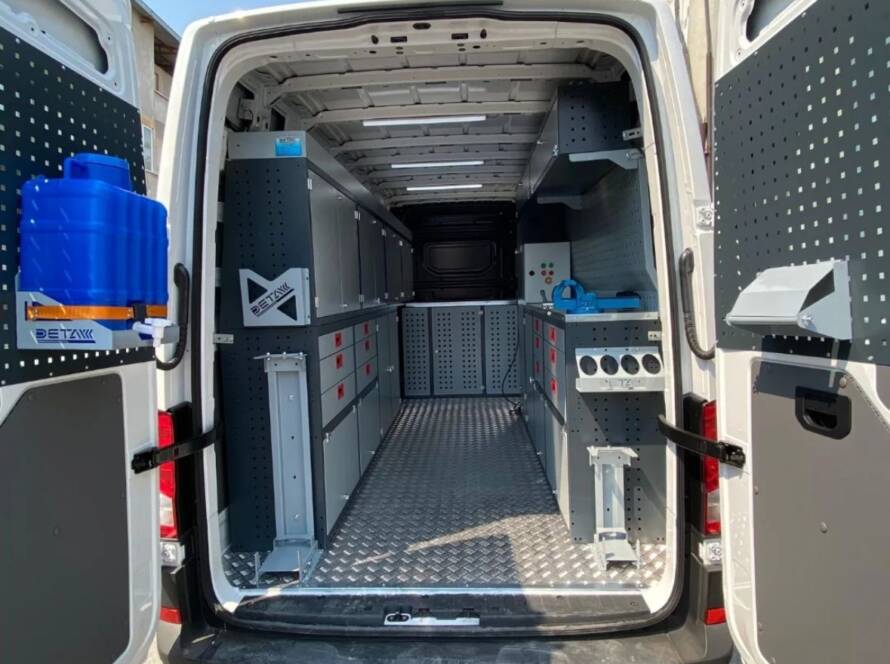
Calculate Payload and Axle Loads Before Finalizing the Layout
A large drawer cabinet can store an impressive amount of equipment, but that capacity creates risk when the project ignores vehicle payload. The complete operating weight includes the van, driver, passengers, cabinets, flooring, partition, lighting, electrical conversion, tools, spare parts, fluids, recovery equipment, and any temporary load carried during a call. Vehicle body builder guidance commonly requires converters to verify actual vehicle and axle weights and to account for the influence of installed equipment, which means the planner should obtain information for the exact model, wheelbase, roof height, engine, drive arrangement, and permitted gross weight rather than relying on general panel van figures.
Heavy drawers should normally remain low, while the loaded cabinet mass should be distributed thoughtfully between the left and right sides and between the front and rear axles. The design of an in-vehicle rack system should preserve enough payload for technicians and changing daily equipment, because a van that sits within its limits when empty may exceed them after spare parts, a second worker, recovery accessories, and customer equipment are added. I recommend weighing the completed vehicle in realistic operating condition and recording axle loads rather than depending only on estimates. ⚖️
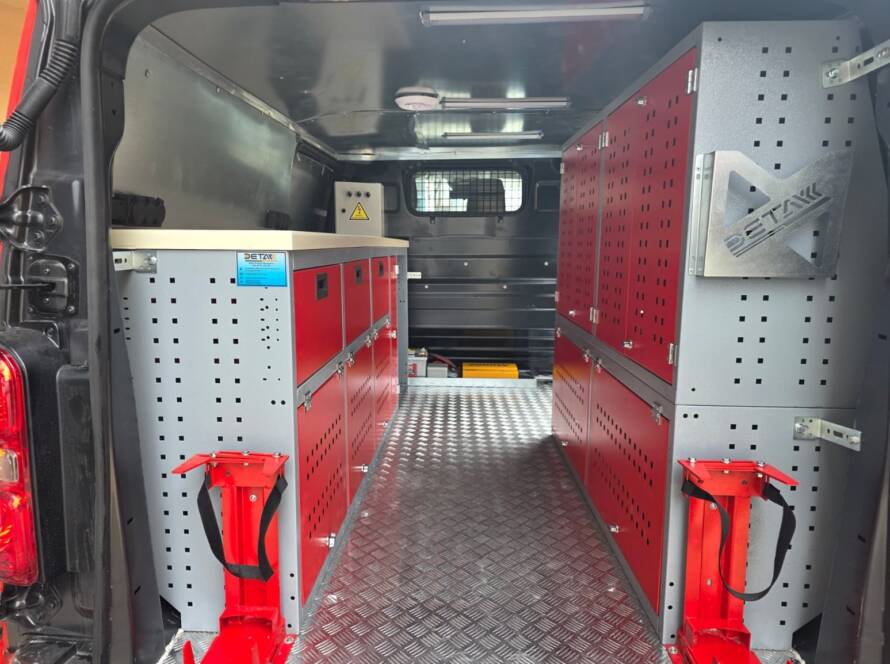
Create Dedicated Zones for Immediate, Clean, Dirty, and Heavy Equipment
Clear zoning helps a roadside technician understand the vehicle at a glance, even during poor weather or a stressful emergency. The immediate response zone should contain warning and personal safety equipment, the clean zone should protect electronic instruments and unused PPE, the working zone should contain frequently used tools and consumables, the heavy zone should keep dense equipment low and securely restrained, and the dirty return zone should hold removed components, wet straps, damaged parts, and used absorbent materials until they can be handled correctly at the depot.
This organization also supports inventory management because every item has an assigned location and technicians can identify missing equipment before leaving the site. A complete collection of in-vehicle equipment should use durable labels, adjustable dividers, shadow boards, removable bins, or shaped inserts according to the tool category. Colour or symbol coding may help teams distinguish electrical, mechanical, safety, diagnostic, and cleaning compartments, although the system should remain simple enough to understand without a lengthy explanation. The goal is to make returning a tool to the correct place easier than leaving it on the floor.
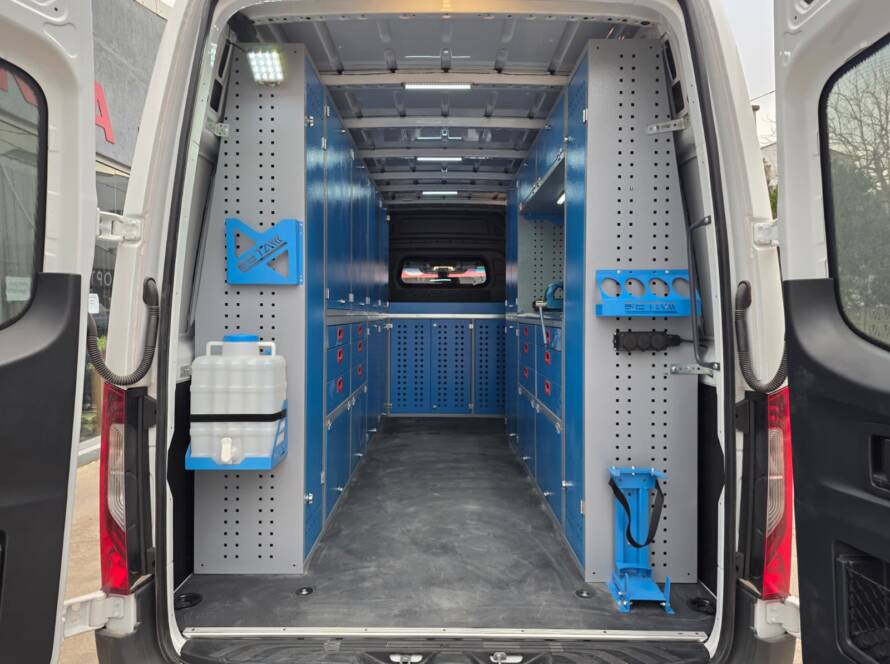
A Practical Drawer Cabinet Planning Example
Imagine a two person roadside assistance team using a medium wheelbase panel van and carrying warning cones, flashing lamps, high visibility PPE, a trolley jack, wheel tools, a battery booster, diagnostic equipment, hand tools, cordless power tools, air hoses, tyre repair materials, electrical parts, towing accessories, and several spare components. I would begin by weighing the main equipment groups and identifying the items required during the first two minutes of a call. Warning equipment would receive an independent compartment immediately beside the rear door, while the battery booster and trolley jack would occupy low, load rated positions close to the loading edge.
Shallow drawers near waist height would hold sockets, electrical terminals, fuses, tyre valves, and adapters, while medium drawers would hold hand tools and cordless equipment in shaped dividers. A padded lockable drawer would protect the diagnostic tablet, tester, multimeter, and charging accessories, and a washable enclosed compartment would receive damaged or oily parts. I would preserve a clear aisle, check that fully opened drawers do not block the technician’s escape route, and place a foldable workbench near the rear working area for component inspection and equipment preparation.
Before production, I would build a simple full size mockup and ask technicians to simulate several calls while wearing normal clothing and gloves. They would remove warning equipment, collect a jack and wheel tools, use diagnostic devices, return a damaged component, and close every compartment. This test often reveals door conflicts, uncomfortable reaches, poor label visibility, and drawers that are deeper than necessary. It is also where Detay Industry can translate technical dimensions into a layout shaped by real human movement rather than assumptions. 👷♂️📋
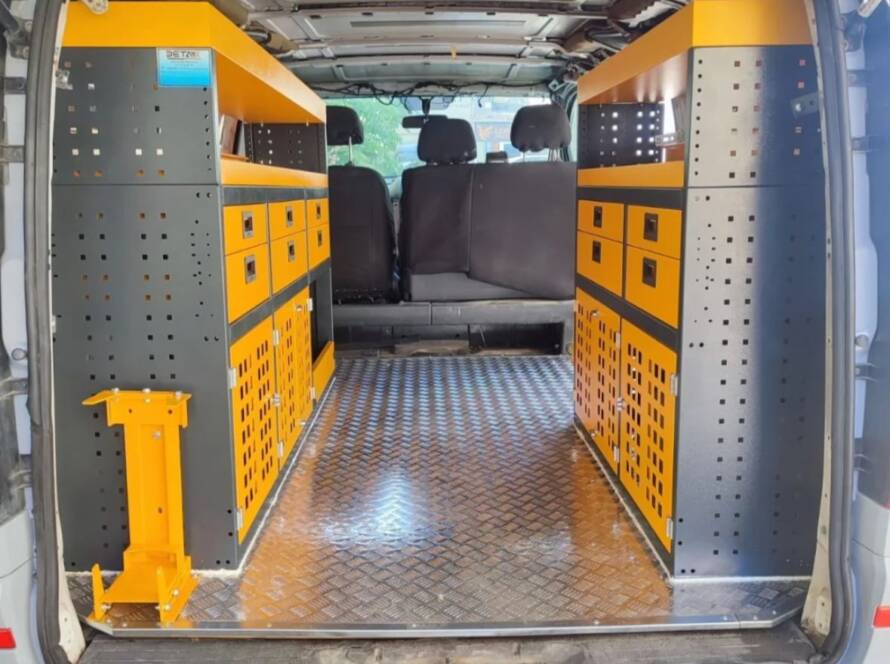
Inspect Drawer Cabinets as Part of Fleet Maintenance
Equipment safety does not end when the vehicle leaves the conversion workshop, because cabinet fasteners, drawer slides, locks, hinges, dividers, and restraints experience thousands of operating cycles and continuous road vibration. Fleet managers should create an inspection schedule covering mounting points, unusual movement, corrosion, drawer alignment, damaged stops, weakened locks, overloaded compartments, worn inserts, unreadable labels, and loose electrical cables. Technicians should report new rattles, drawers that resist closing, or equipment that has changed position during travel, because these details can provide an early warning before a more serious failure occurs.
Teams should also review the vehicle inventory regularly and remove obsolete tools, unnecessary spare parts, damaged equipment, and accumulated waste. Cabinets can encourage workers to carry more than they need simply because space remains available, so periodic weight checks and drawer load reviews help protect payload capacity. A modular rack systems approach allows dividers, drawer purposes, and storage zones to evolve as the fleet receives new tools or responsibilities, but every alteration should preserve the original mounting, loading, access, and safety principles.
Conclusion
Drawer cabinets improve equipment safety in roadside assistance vehicles when designers treat them as engineered load control systems rather than simple storage furniture. The process should begin with the roadside workflow, provide immediate access to warning equipment, position tools according to weight and frequency of use, secure the cabinet to suitable vehicle locations, lock every drawer during travel, protect diagnostic devices, separate clean and dirty materials, verify payload and axle loads, and maintain the installation throughout its working life. An effective in-vehicle cabinet allows technicians to find equipment quickly without sacrificing control, while thoughtful drawer depths and internal dividers prevent tools from colliding like loose stones inside a moving box. 🚐✨ With a vehicle specific design, realistic load calculations, reliable locks, ergonomic access, and regular inspections, Detay Industry can help roadside assistance teams protect their equipment and arrive at each call with a mobile workshop that feels organized, dependable, and ready for action.
